DNF Mobile’s Proving Grounds packed into that massive gap between classes!
네오필


A “space gap” is what people call those ridiculously long breaks between classes on a college timetable. Usually, it means you have 4 hours or more free—long enough to feel like it stretches out into space.
At that point, you could just head to a PC bang and get a solid gaming session in. Personally, I’d use that time to run the newly updated Proving Grounds in DNF Mobile.
Proving Grounds brings back Magos, the boss who kicked off the opening chapter of the Calamity Dungeon after Pirito.
That excitement wore off pretty quickly, though. After trying it myself, I found the difficulty was high enough that even a character with a finished endgame build would struggle.
So here’s a quick review and guide.
Proving Grounds Basic Info


The entry requirement for DNF Mobile Proving Grounds is level 85 cap and 120,000 Adventurer Fame. Each week, you can challenge it with 3 characters per account, with 10 entries per character, for a total of 30 weekly runs.
Each run has a 5-minute time limit, and you can only use 1 revive coin.
The difficulty ranges from Stage 1 to Stage 15. You do not need to clear them in order from Stage 1, and you can jump straight into any stage you want.


That said, rankings only start being recorded from Stage 10 onward.
How to Clear It

If this is your first time facing Magos, you can also use Practice Mode with no gear equipped or on an alt character.
The boss pattern is basically the original Magos with all kinds of debuffs layered on top, similar to Labyrinth of Illusions.
So if you’ve already learned Magos before, the boss itself is not the hard part. Compared to Calix or Asmar, Magos moves more slowly and is generally easier to dodge.
The real issue is the debuffs.


Debuffs applied at Stage 15 (random)


From Stage 10 onward, level 4-5 debuffs start showing up in earnest, and that is where the difficulty spikes hard.
From Stage 11 and above, 13 to 16 debuffs are applied, and the higher the stage, the higher the debuff levels go.
If your character is strong enough to clear Hasmar, pushing through to Stage 13 should be manageable. But from Stage 14 onward, a lot of runs fail not because of damage, but because the debuffs get in the way.


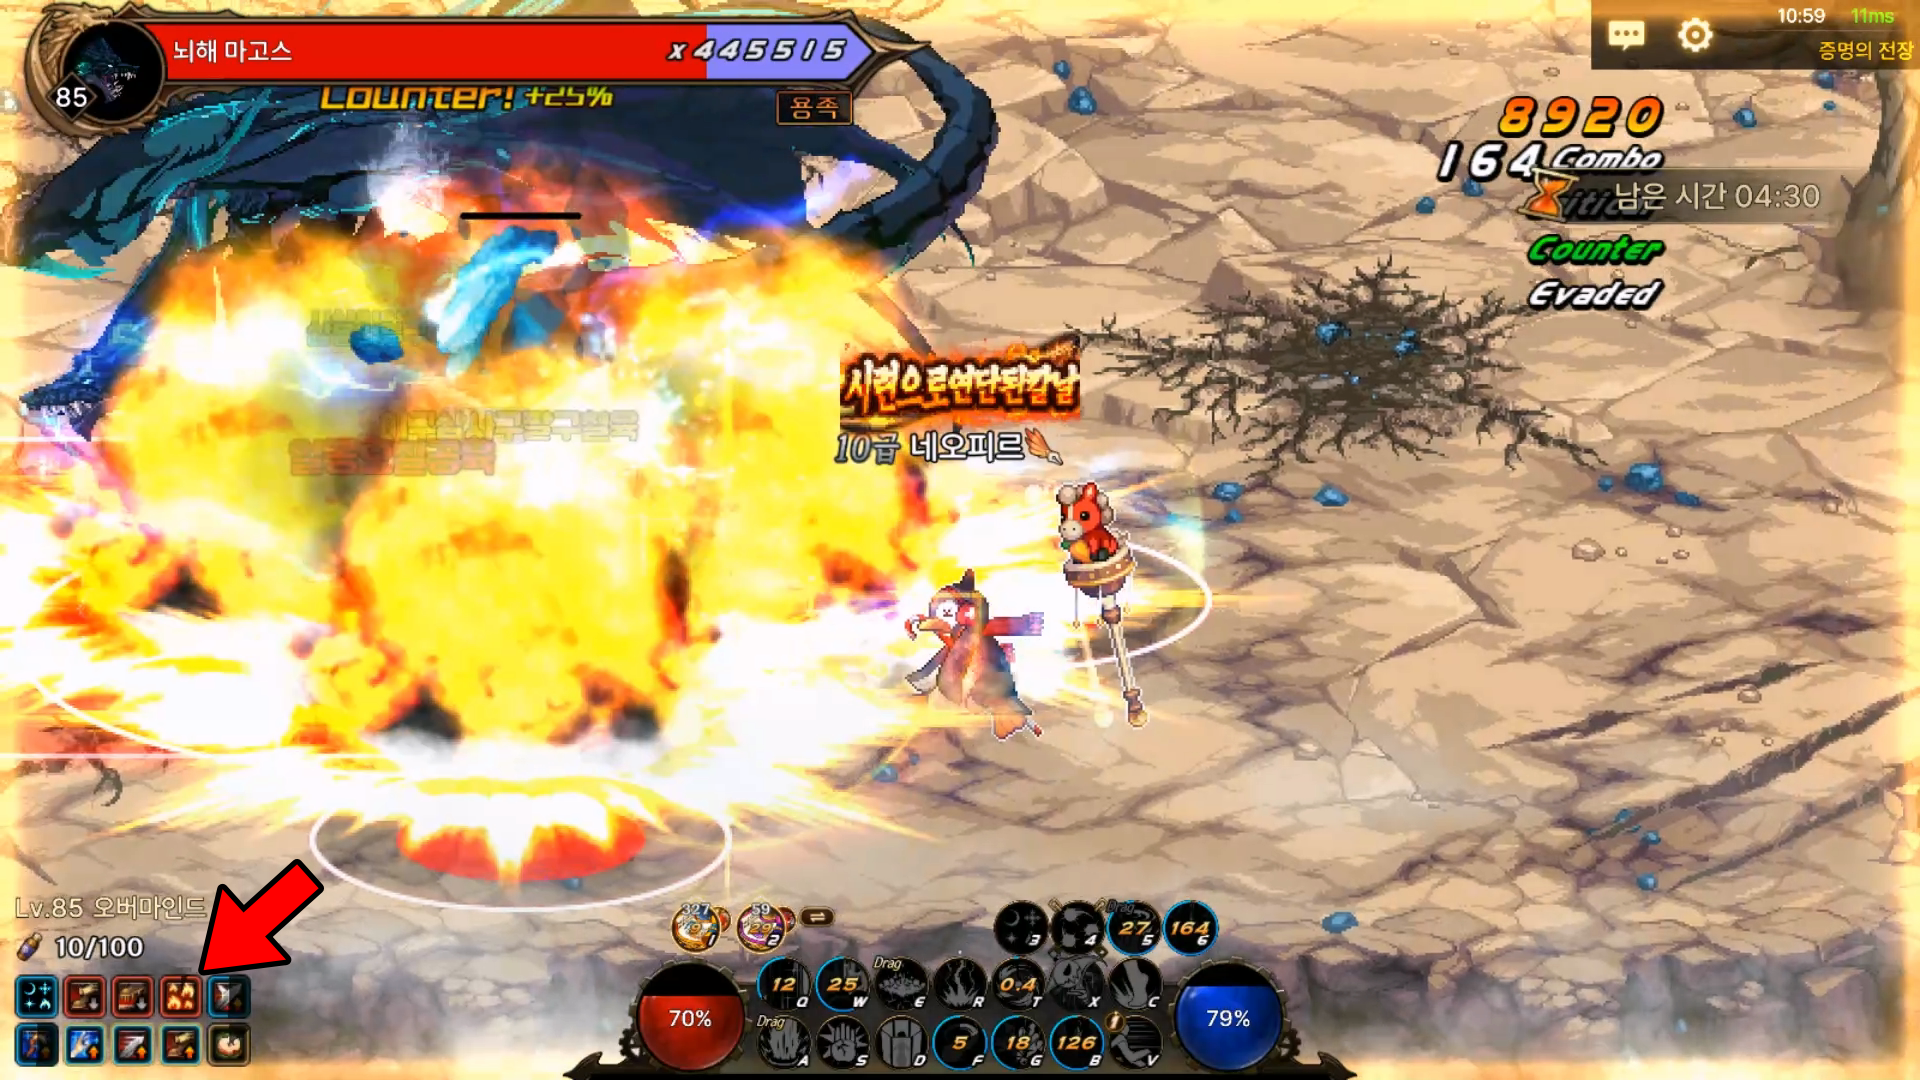

The pattern you really need to respect is the meteor fall.
Do not rush in too fast here, since that can still get you hit with a burn debuff.
At level 5, it drops every 8 seconds in a cross-shaped AoE.
At lower levels, getting clipped by it is not a huge deal. But with level 5 meteors, even a graze applies a burn debuff.
If you do not tank through it with 3 healing potions, you are basically dead on the spot.
That means even when you need to hide behind the rock to avoid Magos’s breath, you should clear the meteor on the outside first before moving in.


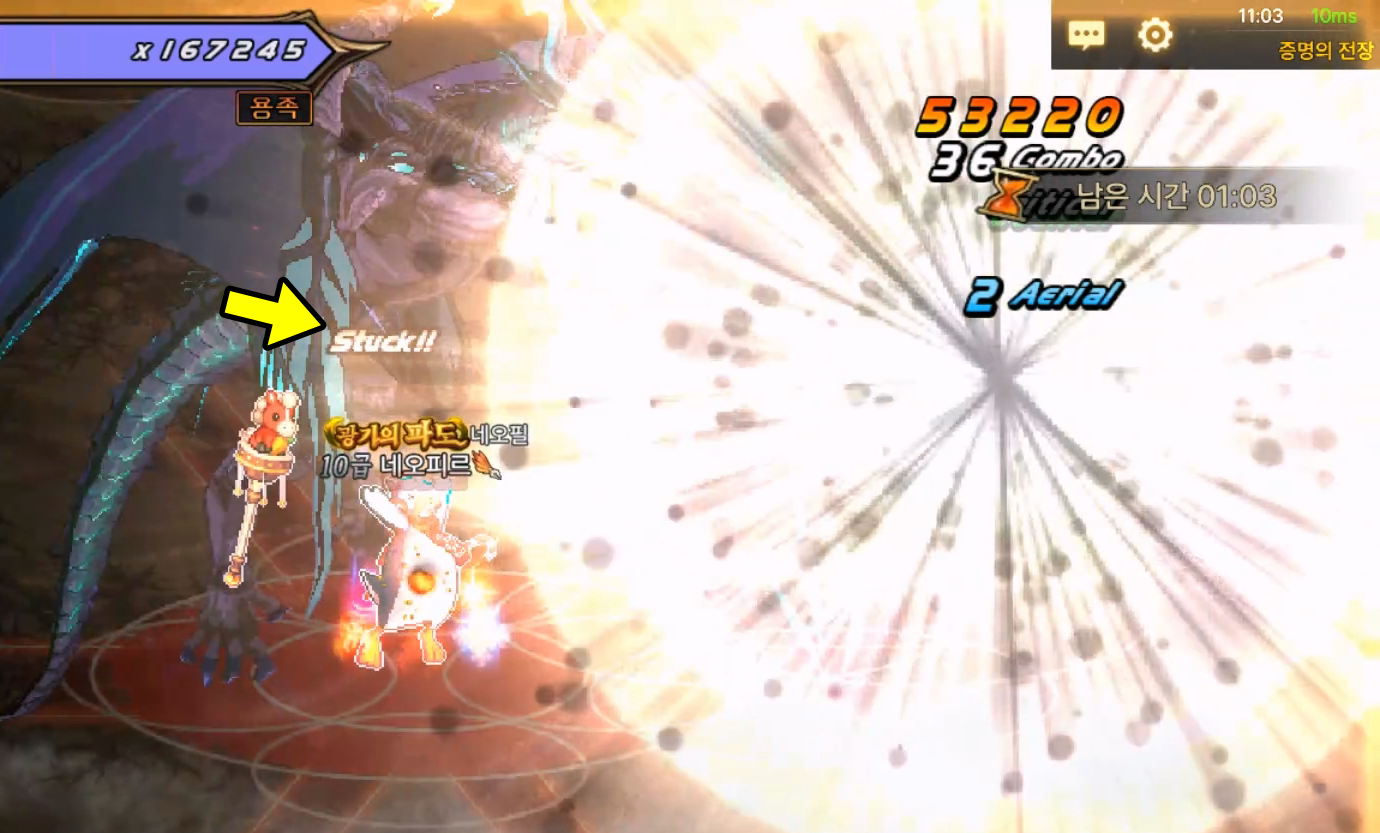
You also need to watch out for poison damage and freeze fields that can trigger when Magos hits you.


And if you step on a web, your movement speed drops by a massive 80%, so there will be plenty of situations where you need to get out with a movement skill or emergency dodge.
Overall, the right mindset here is simple: play like you cannot afford to get hit at all.


You can reroll these debuffs up to 3 times per day.


This does not remove a specific debuff completely. It is really just for bringing down the level of the debuffs that are especially punishing for your character, even if only a little.
There is a night-and-day difference between level 5 and level 4 for Magos’s HP, defense, recovery, and evasion rate. And among those, evasion rate is 30% at level 4 and 50% at level 5.

At 50%, even your first and second awakenings can start missing over and over, which is enough to completely kill your momentum. So I strongly recommend rerolling until that option drops to level 4 before you go in.
And if it is still level 5, honestly, it is better to skip that day and reroll again the next day.
Stage 14 Clear Impressions


This update also opened up the Light Epic transcendence feature, and with that, I finished my endgame setup and cleared up to Stage 14.
After clearing it and looking back, the deciding factor was not raw damage, but the survival utility built into the set options.


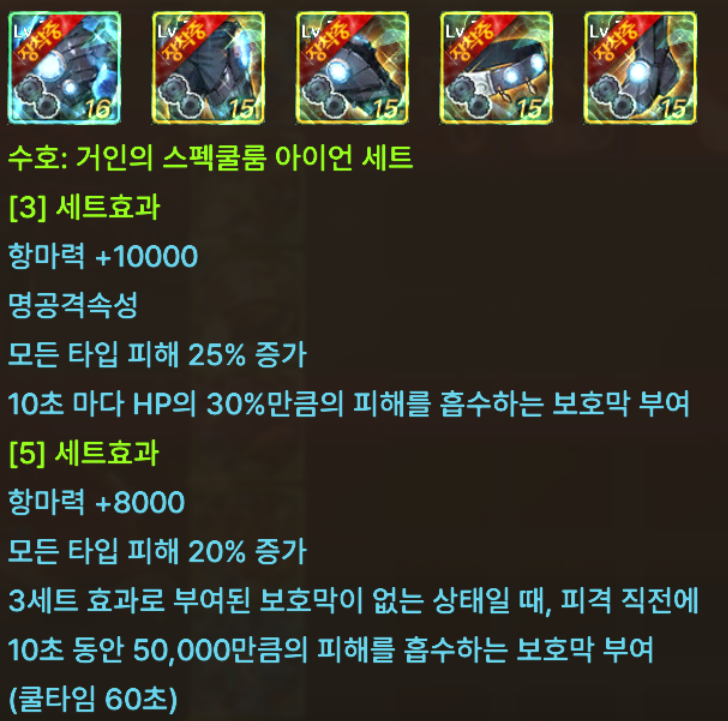


The shield and the extra defense/movement speed helped a lot too, but the weapon’s 5-second invincibility effect from 썬콜 was especially valuable.
There were several moments where that 썬콜 invincibility saved the run—like when AoEs covered the floor and walking out was not realistic, or when I was hiding behind a rock and meteors started dropping at the same time.


I also recommend using guild food. Some players were even choosing only dishes that boost accuracy.
Rewards
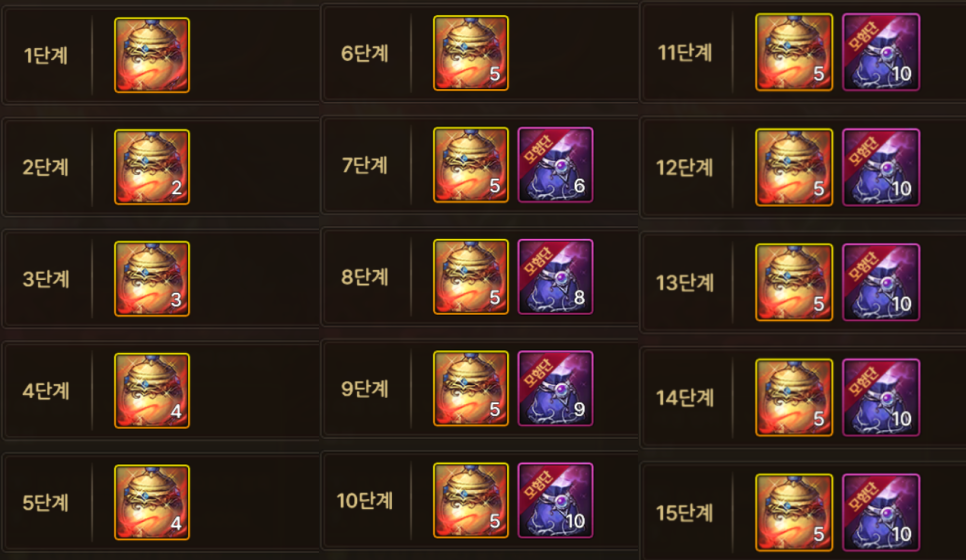


These are the Proving Grounds clear rewards. Rewards are distributed after next week’s maintenance based on your highest clear.
The main reward, the equipment pot, is fixed at 5 from Stage 7 onward, and after that, the number of Mysterious Material Selection Pouches increases gradually.
The thing is, from Stage 10 to Stage 15, the rewards are exactly the same: 5 pots and 10 pouches. So unless you are aiming for ranking, there is no real need to clear above Stage 11.
In other words, if your gear is good enough, clearing at least Stage 7 and up to Stage 10 each week on 3 characters is already very efficient.
There is no need to feel pressured into forcing higher stages.


The equipment pots have a 40% chance to be account-bound.


The odds of pulling Exceed equipment here are probably low, but opening 15 of these every week should still be pretty fun.
Wrapping Up
That wraps up this guide to DNF Mobile Proving Grounds.
The new Calamity Dungeon Soldoros and another challenge-type mode are also said to be in development, so I’m curious whether, like Proving Grounds, they’ll keep moving toward a design where survival utility matters more and more, or introduce a completely different approach.