Let’s get some proper finger practice in..! A guide to taking on Verus Hilla
마포감튀
Hello.
This is Mapo Gamtyu.
Today, I’ll be covering Verus Hilla, the boss that many MapleStory beginners hit as a major wall.
MapleStory bosses generally have two kinds of mechanics.
The first is map mechanics, which are patterns that keep occurring at fixed intervals regardless of the boss’s animation.
The second is boss mechanics, which are the boss’s own specific attack patterns.
Starting with Verus Hilla, the map mechanics become especially tricky, which is why many beginners struggle here.
Let’s go through them carefully, one by one.
This guide is written from a beginner’s perspective, so I won’t list the exact percentage of HP each attack removes.
I’ll also summarize some useful beginner tips again at the bottom, so please read to the end!
Verus Hilla Death Count System (Soul Slash, Soul Collection)
Verus Hilla has a “thread” system that combines both map mechanics and boss mechanics.
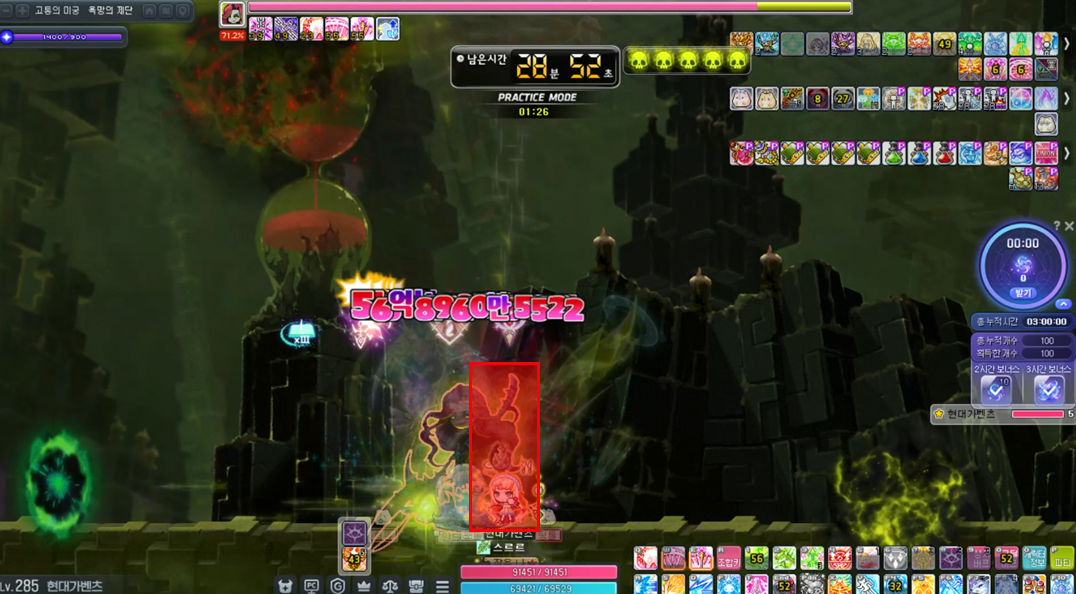
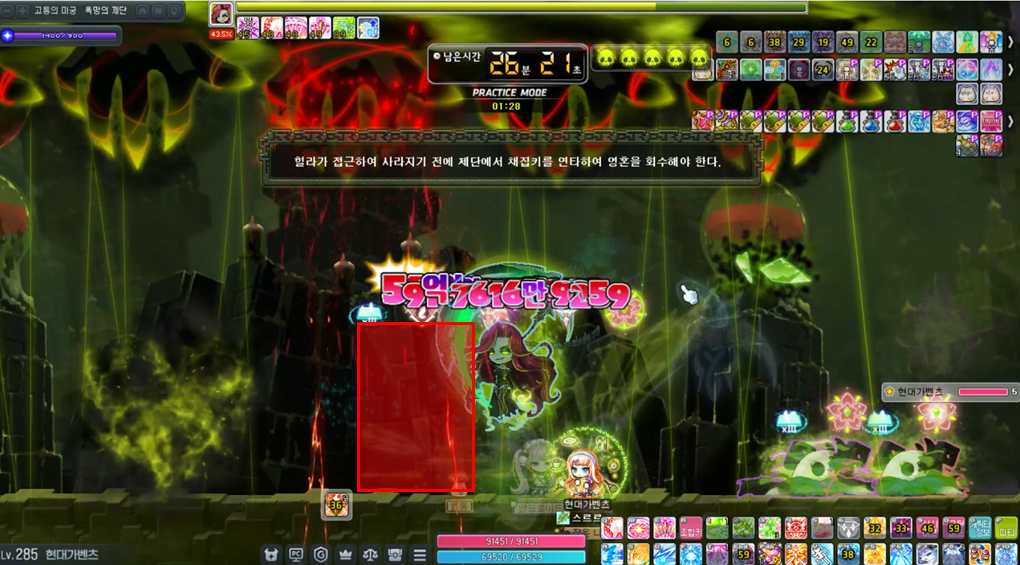
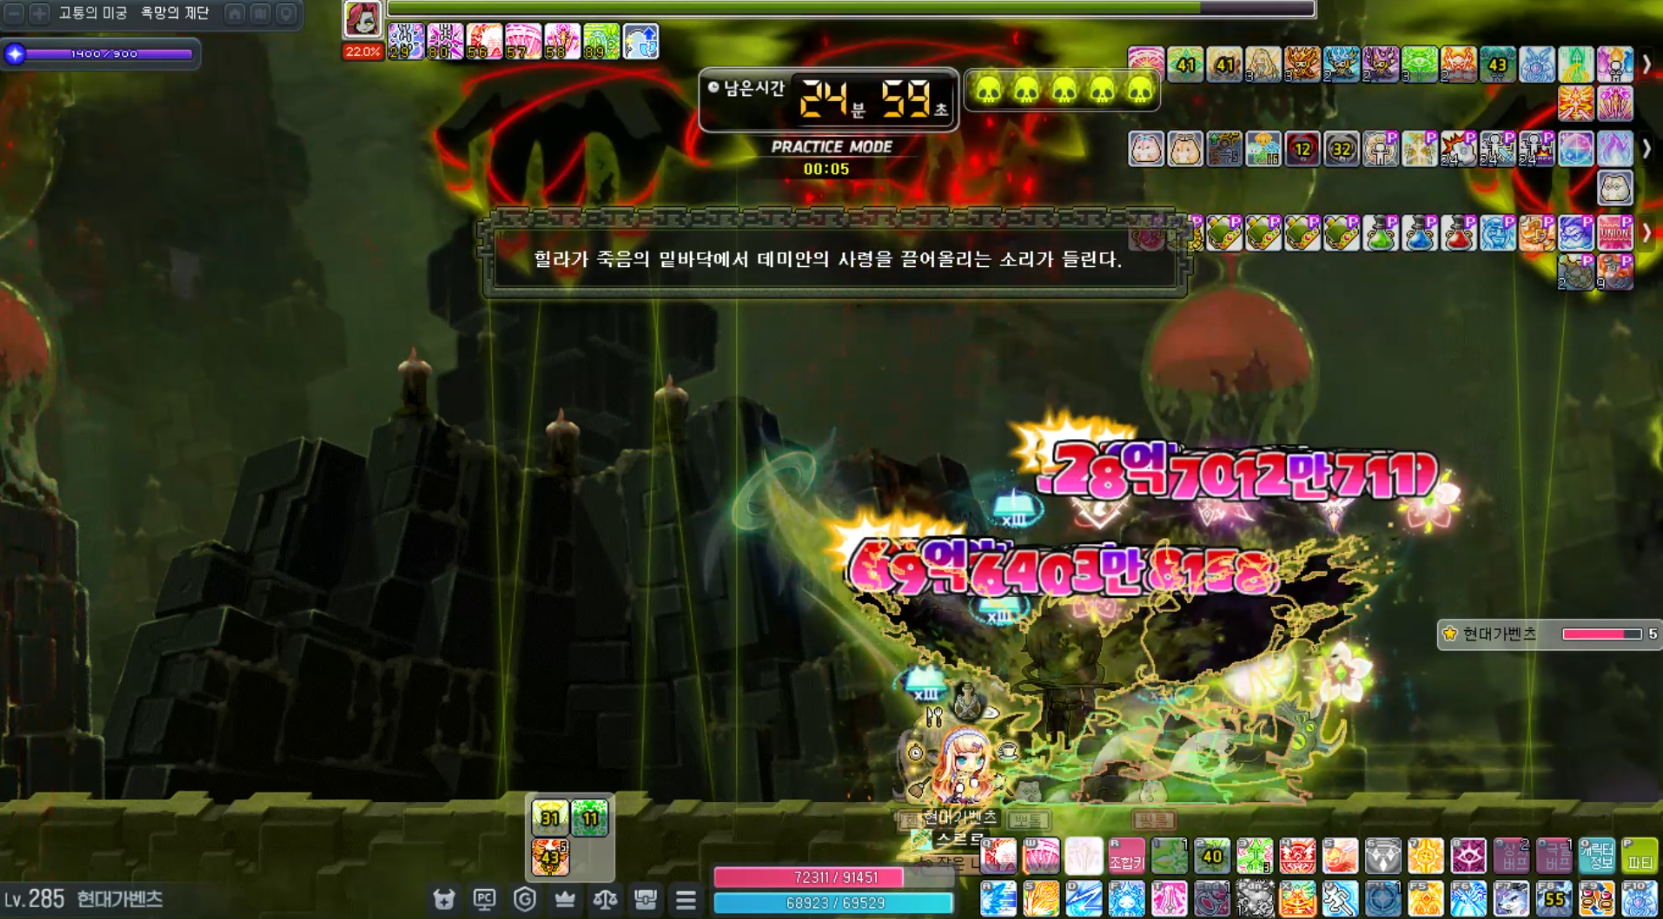
As soon as you enter the boss fight, you’ll see green skulls at the top.
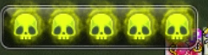
These lit-up skulls are your “total death count.”
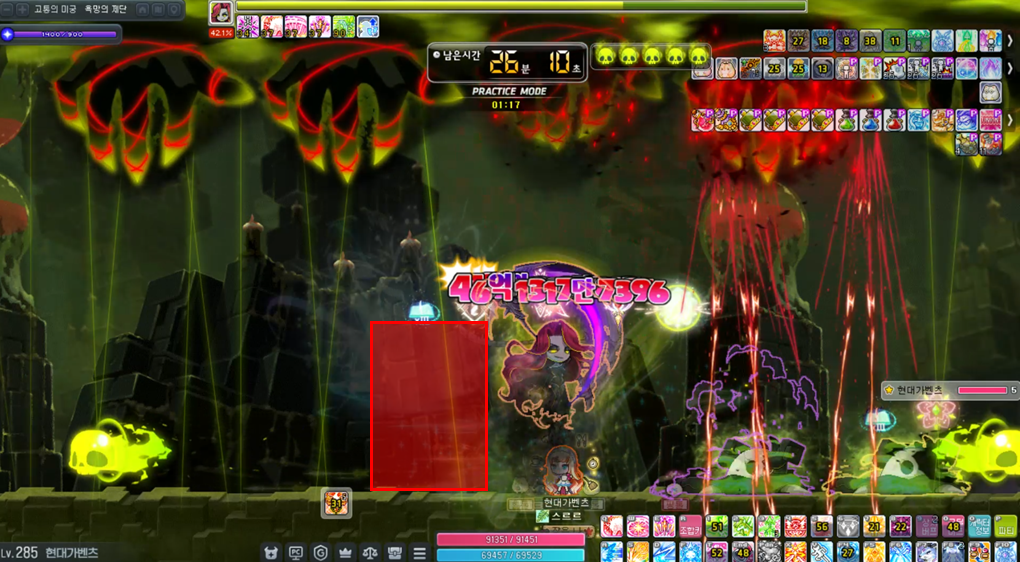
When you die, or when Soul Slash happens, your total death count is reduced by the number of red skulls currently lit.
This is what it looks like when your death count is reduced after dying.
This is what it looks like when your death count is reduced after Soul Slash while red skulls are active.
You can turn red skulls back into green skulls through “Soul Collection” at the Altar of Souls,
but once a skull’s light has gone out, it does not come back.
When the number of red skulls reaches at least 1/2 of your total death count, an altar appears on the map,
and if you clear the mechanic by repeatedly pressing the harvest key at the altar, those skulls return to green.
The “total death count” used as the standard here is a little confusing.
The game treats the number of skulls remaining immediately after the last Soul Slash as your total death count,
so if your death count drops because you actually died, you can end up in the unfortunate situation where you can’t summon the altar.
For example, if you have 3 death counts left after Soul Slash,
you need to make 2 red skulls to spawn the altar, but if you die in the meantime and lose one death count,
then you’re left with only 2 green skulls, and in that state you can no longer create the altar.
In Verus Hilla, if all skulls go dark
or if all skulls turn red, you get “deca out.”
Verus Hilla Thread Count (Red Skulls, Green Skulls, Altar)
So how do red skulls actually happen?
You get them by being hit by the “thread” from the map mechanic I’ll explain next.
At this point, you might think, if filling the red skulls gets you knocked out, wouldn’t it be better to avoid making red skulls at all..
But Verus Hilla keeps you under a permanent healing lock, and you can only use potions for 5 seconds after clearing the altar,
so clearing the altar is not optional. It’s mandatory.
If you get hit by thread and bring your red skulls to at least 1/2 of your total death count,

an altar will appear on the map.
If you repeatedly press Harvest at the altar (default key: Space),
the red skulls turn back into green skulls, and you can use potions for 5 seconds (with no potion cooldown).
Map Mechanic: Thread
The first map mechanic is “thread.”
At regular intervals, a green trail appears on the map,
and a moment later, a red attack drops down.
This attack deals 0 damage, but it turns one green skull into a red skull
and leaves you unable to move for a short time.
Also, the finger hit by the red line disappears shortly after and follows up with an attack that drops something like a rock.
You’ll often see people say that if you use Will, you can intentionally get hit by several at once,
but if beginners mess this up, you can suddenly get hit by multiple threads in a row and get knocked out, so I recommend just taking them normally, one at a time.
The tip I recommend is this: when your deca is at 5 or 4, it’s good to take one thread hit in advance,
because it helps prevent the situation where Soul Slash timing comes while you’re still trying to set up thread hits and your death count gets reduced first.
Map Mechanic: Poison Cloud
The second map mechanic is the poison cloud.
Gas-cloud-shaped zones appear randomly.
People call them all kinds of names, like poison cloud or poison fart, but since this area deals very high damage every second, you should avoid it.
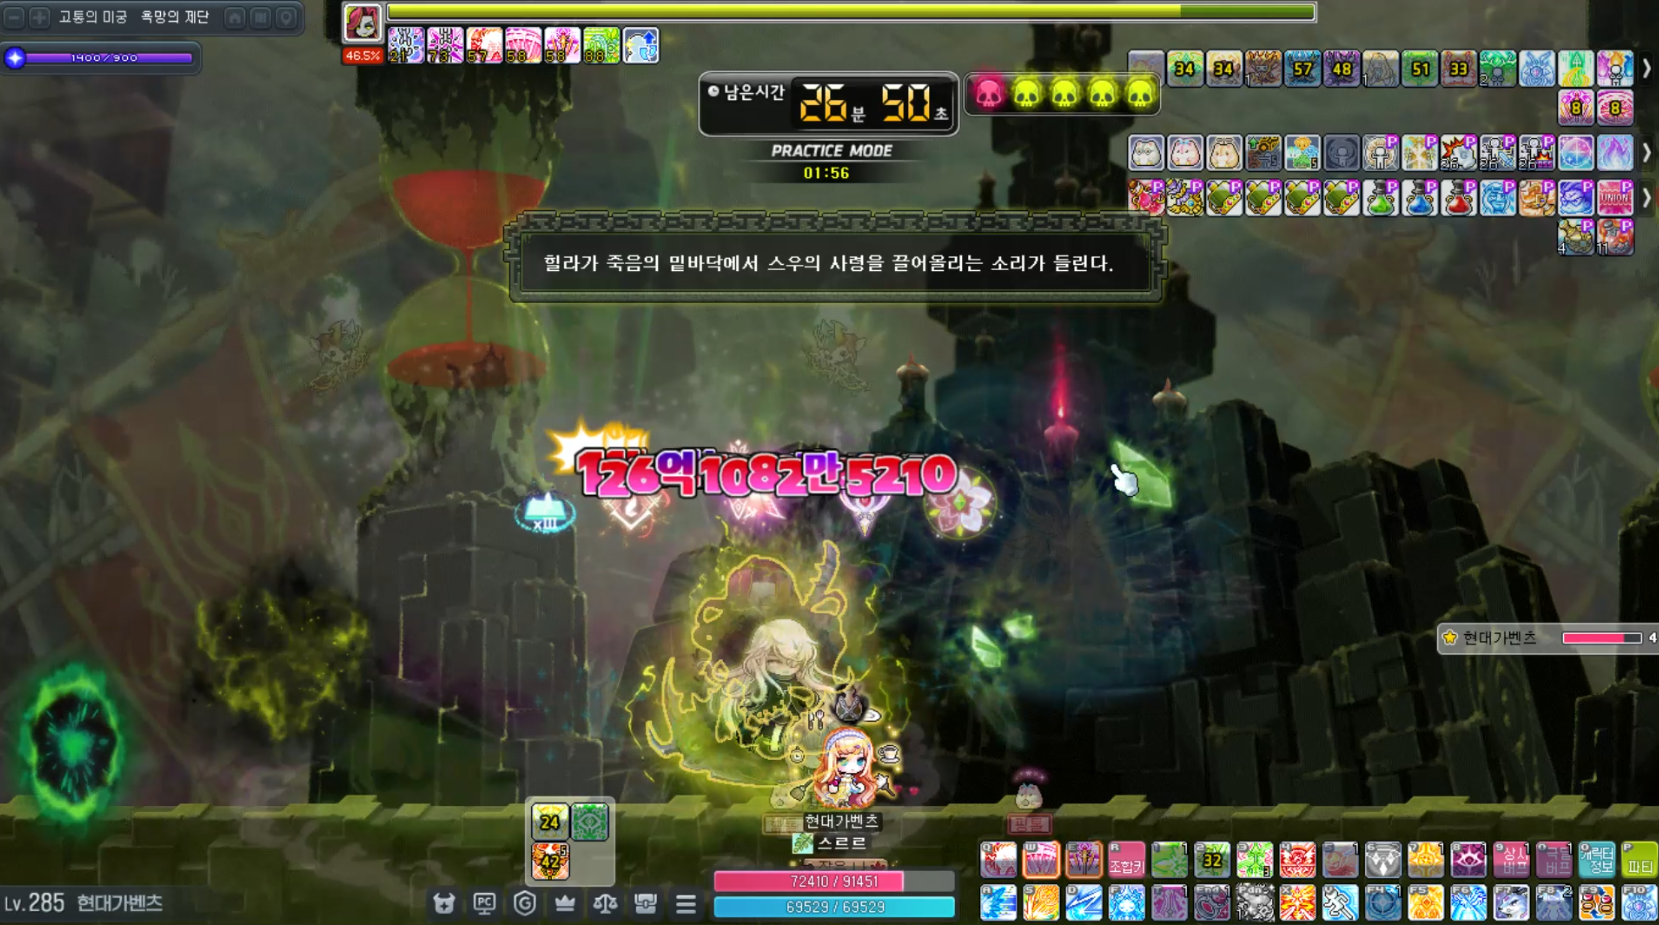
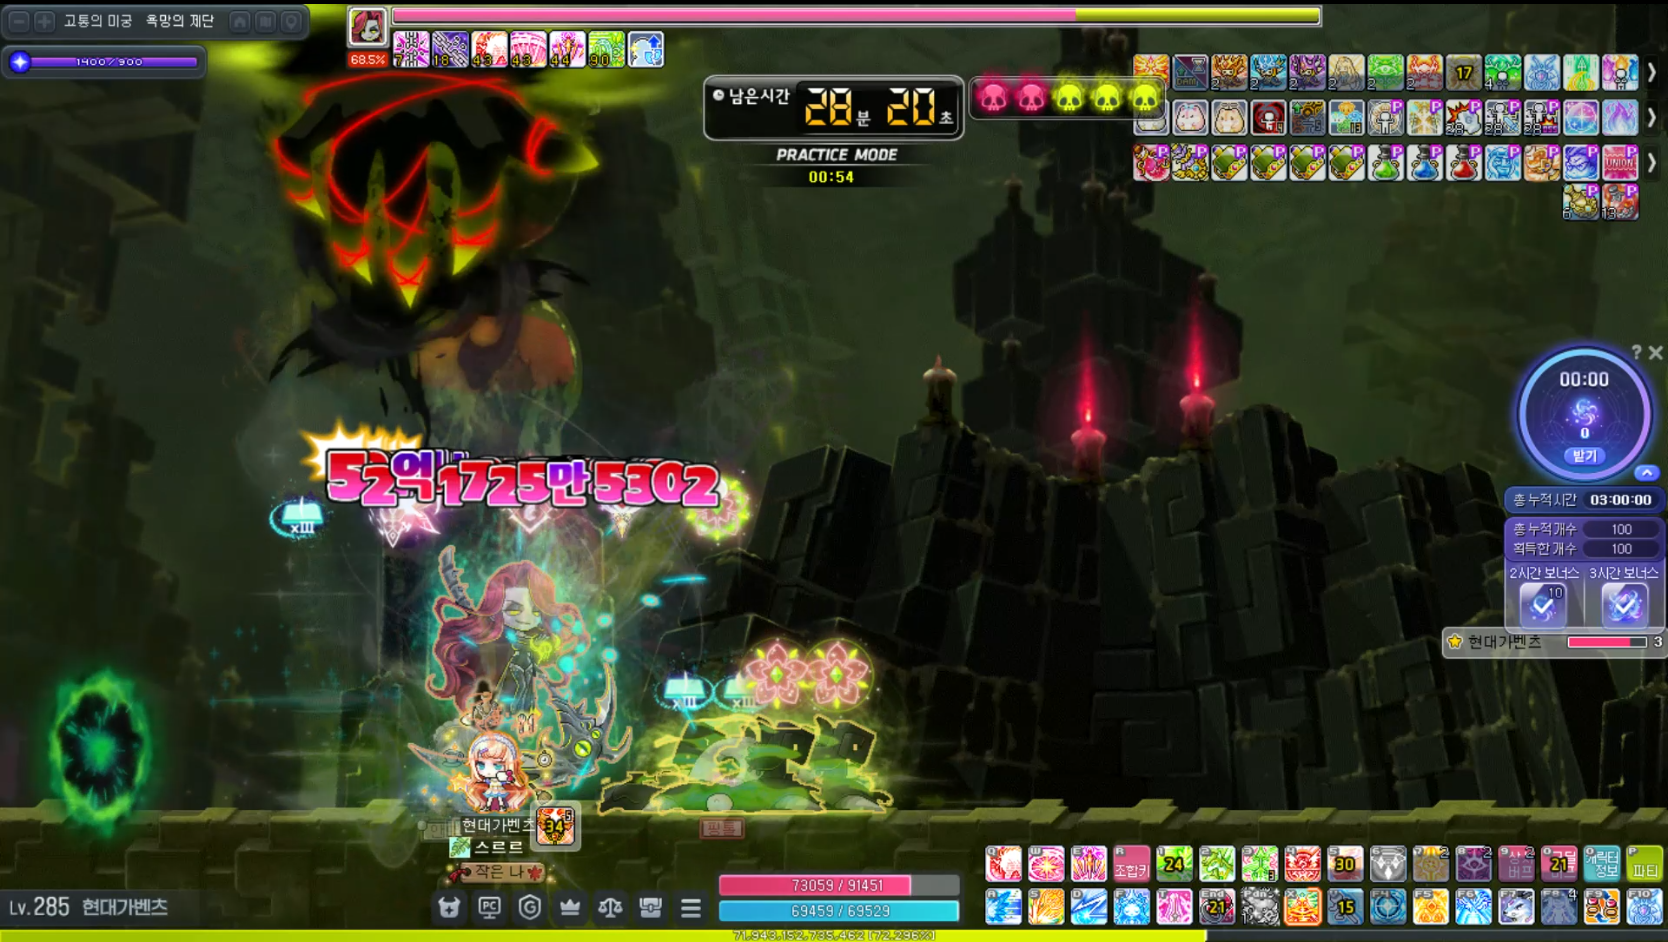
Boss Mechanic: Soul Slash
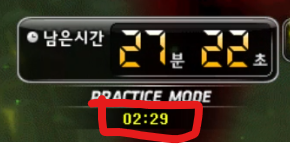
The timer shown below the boss counter tells you how much time is left until Soul Slash.
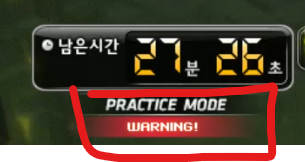
Once there are 5 seconds left, the display changes from the timer to WARNING,
and when it reaches 0, Soul Slash is cast.

At that point, the red skulls are collected and your death count is reduced, and the number of skulls left becomes the base deca count used for altar activation.
Boss Mechanic: Scythe Swing
There is a difference between Phase 1 and Phase 2,
but in both phases, if you stand behind the boss’s body and between her hair at the moment she swings, you won’t take damage.
In Phase 1, it only deals damage in front,
and in Phase 2, right after the swing, the boss fires skulls both in front and behind.
You can either jump at the moment of the swing or stand in a spot where it won’t hit you.
You can avoid the skull projectiles by ducking or jumping.
Boss Mechanic: Bind into Knockback Attack
She raises her hand, sends a soul straight ahead, then swings her scythe for a knockback attack.
If you get hit by the soul, you are bound, and then you are guaranteed to get hit by the scythe attack.
Since both the bind and the knockback can cause unintended red thread hits, this is the most dangerous attack for inexperienced players.
That said, because the attack lasts a long time, it can also be a relatively safe window to take a thread hit or clear the altar from a good position.
When she raises her hand for the soul attack, you can move behind Verus Hilla
or use Blink in the air to avoid the pattern.
Boss Mechanic: Add Summon
She continuously summons adds.
These enemies are not very threatening on their own,
but when they die, they leave corpses on the floor, and those corpses deal damage over time around them before the monsters revive.
In Normal mode, you need to kill them twice to finish them off completely, and in Hard mode, you need to kill them three times.
She usually summons 2 of them in a row,
and if their corpses end up scattered around together with poison clouds, HP management becomes much harder,
so try to kill them in the same spot whenever possible to give yourself as much room to move as you can.
Boss Mechanic: Teleport
The boss teleports to your character’s location.
That’s it, and the teleport itself does not deal damage.
Using this properly is one of the keys to the fight.
Boss Mechanic: Bone Wave (Green Slam, Purple Slam)
She gathers green or purple energy and slams down.
This attack hits extremely hard, so avoid it whenever possible.
The safe zone for the green attack is in front of Hilla,
and the safe zone for the purple attack is behind Hilla.
Memorize it as “green front, purple back.” If the boss starts charging, say “green front, purple back!!” to yourself and move to the correct side so you don’t forget.
Green front, purple back
Boss Mechanic: Summoning Lotus and Damien
When her HP drops below a certain point, she summons Lotus and Damien.
Both of them use knockback attacks, so take them out quickly as soon as they appear.
There really isn’t any special strategy here other than killing them fast..
Useful Tips
Safe zone tips
Deal damage from positions where red threads do not appear very often.
Left) Left side of the hourglass, corner of the pyramid’s first floor
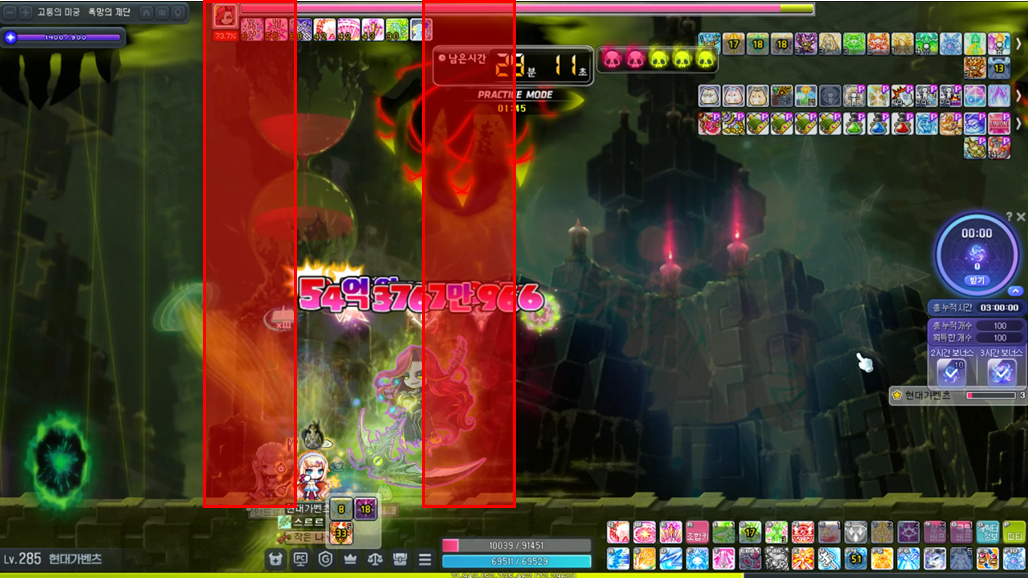
Right) Right side of the hourglass, corner of the pyramid’s first floor
The center also doesn’t get many thread drops, but I don’t recommend staying there because your movement becomes more restricted, and it’s harder to avoid the green/purple bone wave pattern by moving to the edges.
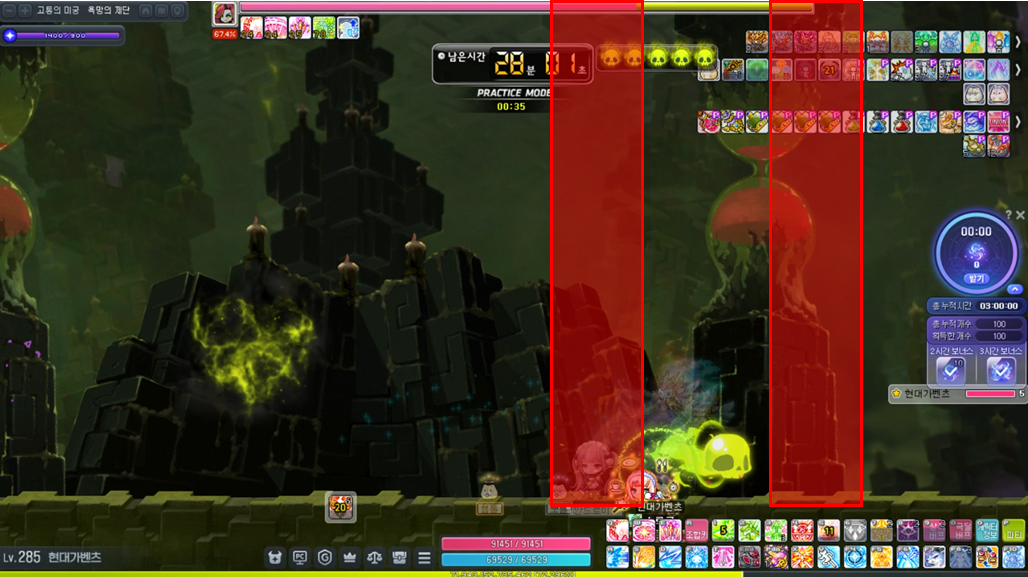
Boss parking position tips
It’s convenient to keep the boss parked between the safe zones, at the purple-marked spots shown in the screenshot below.
Left)

Right)
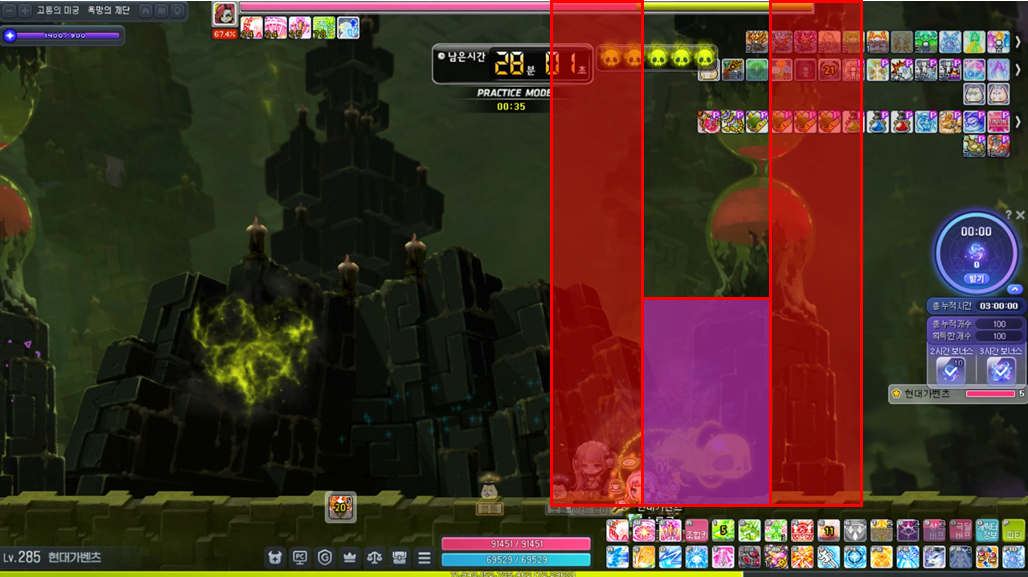
There are safe zones on both sides of these spots, and if you bait patterns toward the wall side, you also get a wider area to move in, which makes the fight much more manageable.
Tips for timing your thread hits
Right after Hilla teleports, run to the opposite side and take a thread hit,
or take the thread hit from the opposite side while Hilla is doing her bind attack.
Tips for timing altar clears
Right after Hilla teleports, run over and clear the altar.
Bait Hilla’s bind attack to the opposite side of the altar, then run over and clear the altar.
Thread management
Even taking thread hits at the start can take longer than you might expect, so when your deca is at 5 or 4, one good method is to intentionally take one hit in advance and then take the remaining thread hits later when you need to clear the altar.
Your death count does not need to stay at 5 no matter what.
When your death count is 5, you need to take 3 hits,
and when your death count is 4, you need to take 2 hits.
In both cases, you are left with 2 skulls, so even if you take one extra thread hit while summoning the altar and running to it, or while clearing it, you are not immediately out. That makes this the most stable setup.
If you’re doing well but make one mistake and Soul Slash drops your death count to 4, it’s still not a major problem in terms of stability, so up to that point you can stay relatively calm.
HP management tips
A lot of people say you should clear the altar when your HP is around 50% or 40%, but from a beginner’s perspective, I think that if your HP is not full, that’s already when you should start thinking about clearing the altar.
At about this amount of HP, you’re actually still fairly safe(?), but from this point on you should already be planning to take thread hits and clear the altar.
As a beginner, it’s common to get hit while setting up thread hits and clearing the altar, so you need to play with enough margin to account for bad situations.
Until how many seconds left can I still do the altar?
I usually think that even with about 30 seconds left, you can still clear it with 3 skulls remaining, but if several bad patterns overlap, it can get difficult,
so I think taking 3 thread hits around 40 to 50 seconds is a much more comfortable timing.
As I mentioned above, I think the most stable setup is to intentionally take about 1 hit in advance, fill the remaining thread hits when around 30 seconds are left, then clear the altar at about 10 seconds before Soul Slash and focus on staying safe afterward.